
A Double Pager


Stick It Down have a card sketch, a single page scrapbook sketch and a double page scrapbook sketch each month.  I have designed the sketches for the cards and some of the single page sketches but always shied away from double pages.  However the team is a member or two down and I've given it a whirl to make up the numbers.  Here is the sketch for October...


I am using supplies from my Counterfeit Kit...


And here is what I came up with.


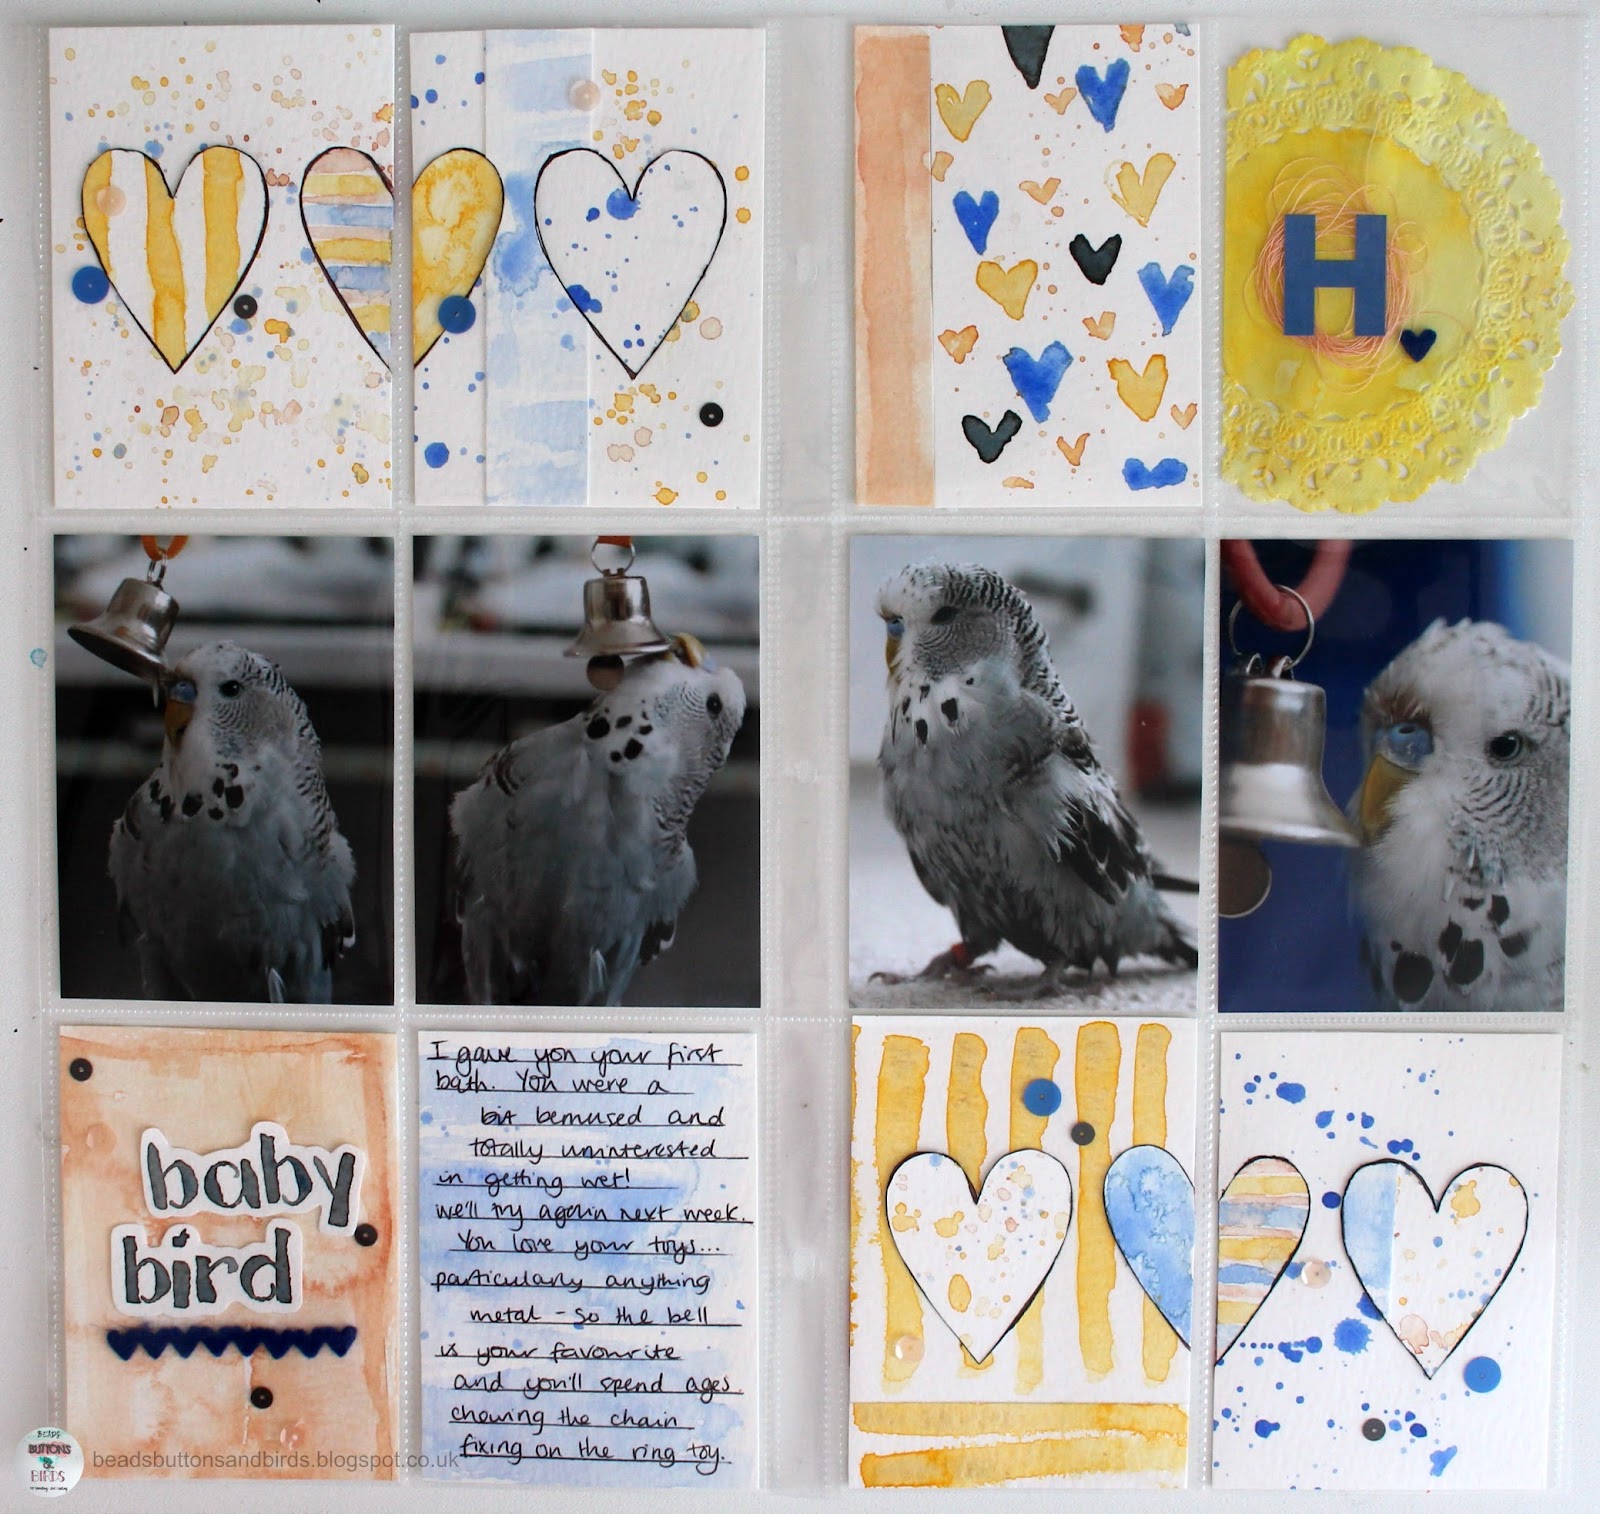
I trimmed down two pockets so I could use the layout of the sketch as is.  I switched the stars to hearts and played fast and loose with the title placement!


H is for Herbert!  Everything painted has been done with Daniel Smith watercolours, everything else was pulled to match.


These hearts are the main feature for me.  A little bit of wisdom - cutting thick watercolour paper with a craft knife is not fun!  But I do like how it all turned out.  You can watch the process here (I edited out all the faffing with the craft knife and watercolour paper... nobody has time to sit through that!!)


So maybe double pagers are not so scary after all?  We'll see if I try another any time soon!  Thanks for stopping by!

Comments

  1. Hi Laura, Herbert is lovely. He obviously likes his bell.

    Hope you have had a good day. Sue

    ReplyDelete
    Replies
    1. He's obsessed Sue... he says goodnight to it - I kid you not!!

      Delete
  2. I thought this looked familiar - I think I liked it on Instagram recently! Very cute! I love the pretty watercolors, and that gorgeous doily with the thread holding a spot for Herbert's initial.

    ReplyDelete
  3. This is fabulous. You have worked magic with those pockets.

    ReplyDelete
  4. What a sweet spread! I love all of your handmade hearts!

    ReplyDelete
  5. Your hand painted water colour papers are just adorable. I love that first photo with your sweet Herbert right there checking out what you'Re up to! I love this spread - really fab. I really want to get more into pocket pages - spreads like this are so inspiring

    ReplyDelete

Post a Comment

Thank you for taking the time to comment.
I love to read your messages...

Popular posts from this blog

Hoppity!

Hoppity hoppity!!  :) Hopeful you have arrived here from Fleur 's blog as part of the Crafty Ribbons Easter Hop .  If not and you've found yourself here wondering what on earth I'm on about (and let’s face it J you wouldn’t be the first!!) check out the Inspirations site for all the juicy details! My project for the hop is         Easter bunting!  I cut three templates first - a triangle pennant, a bird and a heart.        Then I cut the pennant shapes from fibre ribbon, threaded them on to some 3mm satin and evenly spaced them.  I embellished each flag with some beads...       I backed the birds and heart on some thin white card and glued them to the centre of the pennants.   My supplies list: yellow fibre , pink fibre , lime fibre , 3mm satin , button box , white card, glue, beads, needle and thread.   At each stop on the hop there'll be a word to collect and a candy draw. I've got these

WOYWW 159

Hello, Happy Whats On Your Workdesk Wednesday !  As promised a picture of last Wednesdays 'work' finished off.  Post and more photos here . This week I'm showing off the beaded ATC I made... Tricky to photograph so your getting one with flash and one without... It was all parcelled up and sent off to Queen of Desks Julia .  Here is a basic of how it was made... (lots of waffle about wefts and warps!) I use a flexible beading needle.  It is mainly 'eye' so it is very easy to thread. And delica beads which are more regular and accurate than the better known seed bead.  They are slightly more rectangular than round so they line up better. Thread your needle with the weft thread.  (The cross ways thread that weaves back and forth.)  Pick up the beads... Pass the needlefull of beads underneath the warp (tight length ways) threads on the loom... ...and push each bead up in the corresponding g

DMIO: Teach Me Something

A few weeks back I made a dream catcher.  A few readers asked if I could show them how I made it, so, here is my attempt at a tutorial! First up weaving the web. 1. You'll need a hoop and some ribbon/thread/yarn on a bobbin. 2. Attach the ribbon securely to your hoop. 3. Take your ribbon over the top of the hoop... 4. and up through the loop you've just made with the ribbon... 5. so you have a cross over. 6. Continue steps 3-5 until you reach the knot. 7. Now instead of going over the hoop you will crossover the ribbon 8. and through the loop you've just made to give a crossover. Continue on in this fashion until you get to the middle. You need to leave a hole in the middle as this is where the good dreams get through!  They then run down the tassels/feathers/any other hanging decoration and on to the owner.  It should look something like this.  You'll need to play around with your tension until you get a firm web. Now for the tassels - I like to