
Turquoise and Lime


After watching quietly for a couple of weeks I decided to play along at The Artists Play Room.

I was nervous of joining in because I'm not an artist...

Then I read this...

"Here's my first challenge. Are you an artist? Can you say it out loud, for all the world to hear? I've had trouble with claiming "artist" status in the past, but when I embraced all that it meant, I found it so freeing to be what I was from the inside out. I've been an artist since the moment I could pick up a pencil, I just didn't say it out loud. I want to encourage you to SAY IT OUT LOUD by joining me in my "Artist's Play Room" every Saturday. You don't have to be great, just create!"

The theme for the week was turquoise and lime.

I came up with this:
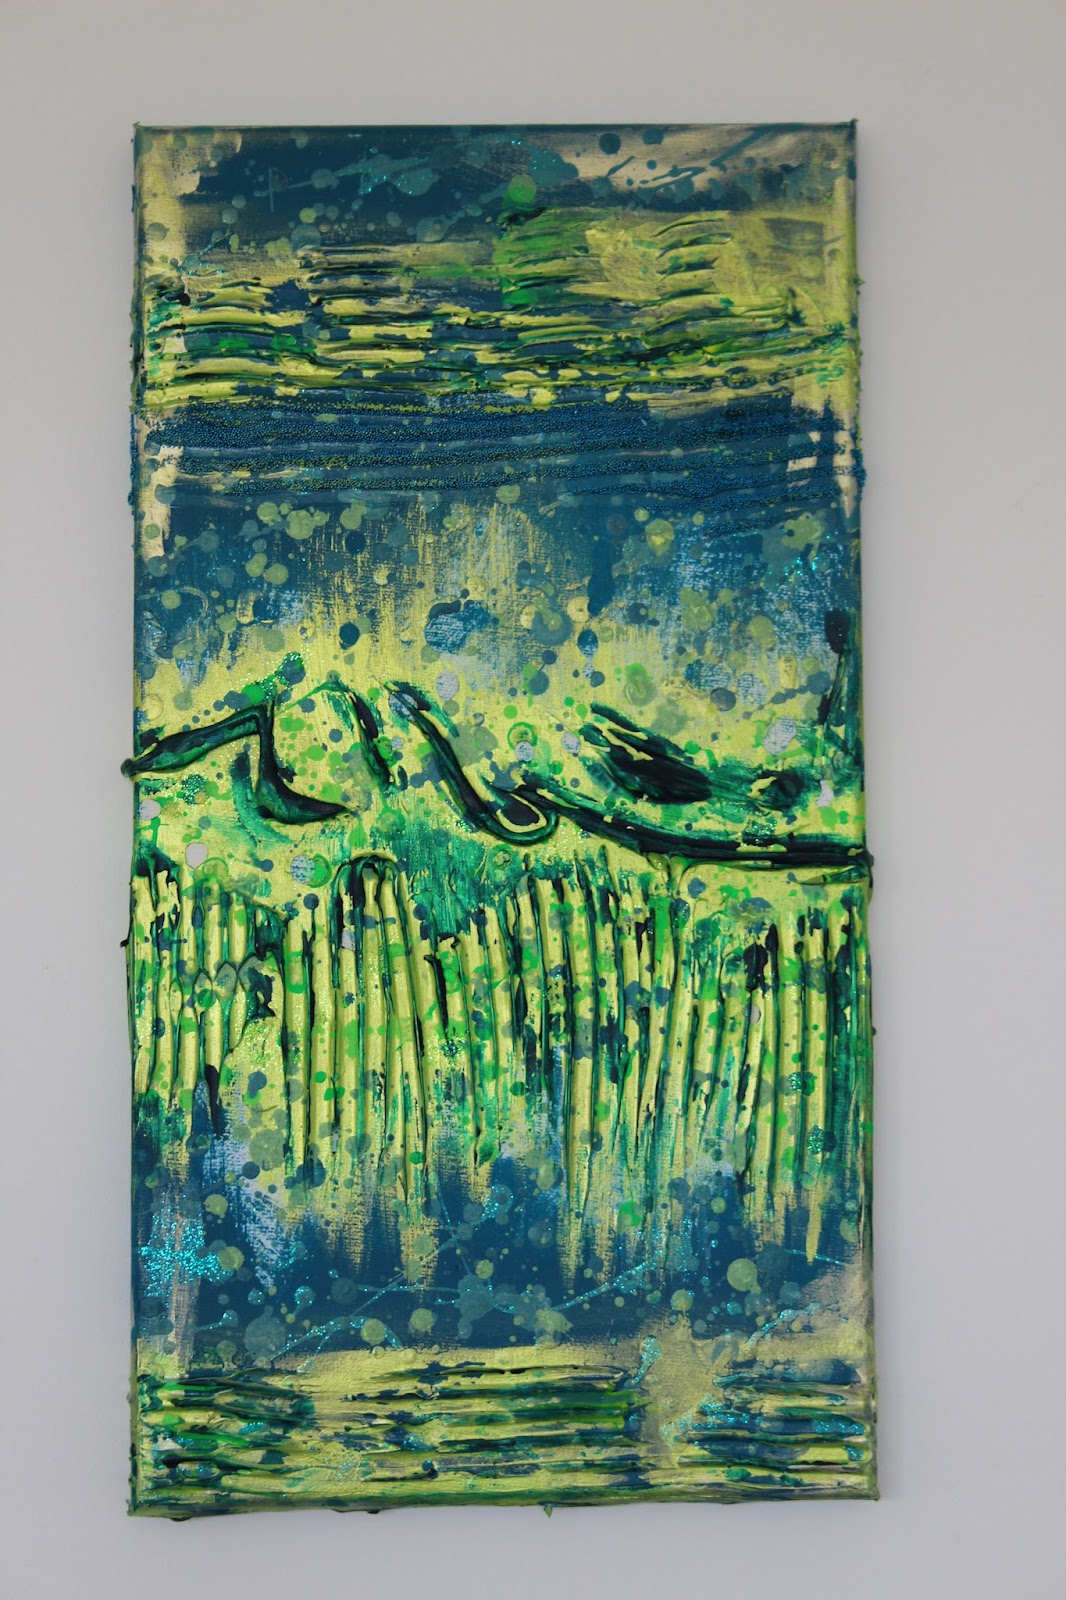

One without flash


and one with flash to show off the sheen and pearl.


And a few close ups...  Glitter


Glass beads.


Texture gel.


And a bucket of ingredients.

After a couple of nothing days (M.E.) I do hope I get it linked up in time, I've left it VERY late! 


Thanks for stopping by!


Comments

  1. WoW!! I could have sworn at the top of this post you said "I'm not an artist".....Helloooo!?! You certainly are!! Loving this very much! :0)

    ReplyDelete
  2. It is fabulous!! Love the textures and the color blends.

    ReplyDelete
  3. Can I TOTALLY agree with Twinkletoes?? Who claimed to NOT be an artist?? *Jen steps onto her soapbox* An artist is one who is compelled to create, to make beauty out of their surroundings using whatever is available. The title artist is in your heart, anyone who does all those creative things AND produces pieces as beautiful as the one you submitted to APR is an artist. Period.
    *Jenn steps off her soapbox*
    Have a lovely day and welcome to the ARTIST'S Play Room, lol. :o)
    Best,
    Jenn

    ReplyDelete
  4. I am so glad you "joined up"! This is so beautiful! I love the sparkles and tiny beads. Thanks for showing your basket of supplies. I have never even used any of those products. They are wonderful, or what you did with them is wonderful.

    ReplyDelete
  5. Artist=one who creates art! This certainly qualifies--you did a fantastic job with all the layers and texture!

    ReplyDelete
  6. What a great entry, I agree with the other comments, you certainly ARE an artist. Love the depth of all the textures. Glad you joined the APR.

    Darla

    ReplyDelete
  7. You are sooo an artist!! Wow, there is so much in that piece, I could look at it for hours. Thanks for showing the 'ingredients' to your piece. I never know what people use to make such gloriously textured pieces and this really helps to understand the process.
    Fabulous piece.
    Von.

    ReplyDelete

Post a Comment

Thank you for taking the time to comment.
I love to read your messages...

Popular posts from this blog

Hoppity!

Hoppity hoppity!!  :) Hopeful you have arrived here from Fleur 's blog as part of the Crafty Ribbons Easter Hop .  If not and you've found yourself here wondering what on earth I'm on about (and let’s face it J you wouldn’t be the first!!) check out the Inspirations site for all the juicy details! My project for the hop is         Easter bunting!  I cut three templates first - a triangle pennant, a bird and a heart.        Then I cut the pennant shapes from fibre ribbon, threaded them on to some 3mm satin and evenly spaced them.  I embellished each flag with some beads...       I backed the birds and heart on some thin white card and glued them to the centre of the pennants.   My supplies list: yellow fibre , pink fibre , lime fibre , 3mm satin , button box , white card, glue, beads, needle and thread.   At each stop on the hop there'll be a word to collect and a candy draw. I've got these

WOYWW 159

Hello, Happy Whats On Your Workdesk Wednesday !  As promised a picture of last Wednesdays 'work' finished off.  Post and more photos here . This week I'm showing off the beaded ATC I made... Tricky to photograph so your getting one with flash and one without... It was all parcelled up and sent off to Queen of Desks Julia .  Here is a basic of how it was made... (lots of waffle about wefts and warps!) I use a flexible beading needle.  It is mainly 'eye' so it is very easy to thread. And delica beads which are more regular and accurate than the better known seed bead.  They are slightly more rectangular than round so they line up better. Thread your needle with the weft thread.  (The cross ways thread that weaves back and forth.)  Pick up the beads... Pass the needlefull of beads underneath the warp (tight length ways) threads on the loom... ...and push each bead up in the corresponding g

DMIO: Teach Me Something

A few weeks back I made a dream catcher.  A few readers asked if I could show them how I made it, so, here is my attempt at a tutorial! First up weaving the web. 1. You'll need a hoop and some ribbon/thread/yarn on a bobbin. 2. Attach the ribbon securely to your hoop. 3. Take your ribbon over the top of the hoop... 4. and up through the loop you've just made with the ribbon... 5. so you have a cross over. 6. Continue steps 3-5 until you reach the knot. 7. Now instead of going over the hoop you will crossover the ribbon 8. and through the loop you've just made to give a crossover. Continue on in this fashion until you get to the middle. You need to leave a hole in the middle as this is where the good dreams get through!  They then run down the tassels/feathers/any other hanging decoration and on to the owner.  It should look something like this.  You'll need to play around with your tension until you get a firm web. Now for the tassels - I like to