I was so excited to get going on my January Counterfeit Kit. The kit to case is from Hip Kit Club.
I did my usual - quick blog hop, study picture of kit, write a list and close the computer down. Then I make the kit just from my list. (After I've made my kit I re-do the hop and leave comments.)
My list read...
grey, minty-turquoise, pink
hearts, stripes, flowers, text, chevron
wood and gold
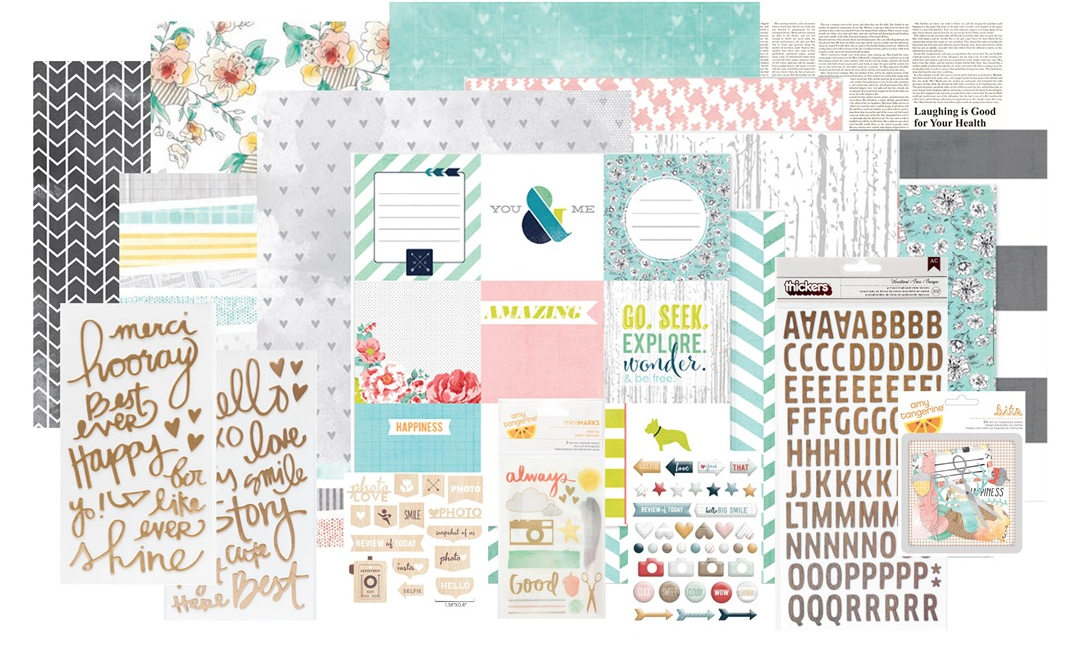
Here is what I pulled from my stash... a few greens and a lot of greys

Some pinks...

A good few of my Secret Santa papers from Virginia made it in to my kit - thank you Virginia!
Gold, wood, grey and turquoise alphas - they grey ones are cut apart tiles from Sodalicious. They are new to me and I'm excited to try them!

A seemingly random selection of bits n bobs. I tried to stick to the colour theme, but there didn't seem to be that many embellishments to counterfeit. I have bits from Things That Shine, rub ons, stickers, acetate and a couple of wooden bits.

That packet of colourful cloud stickers needs to be used up. I've decided each month I will pick something from my stash that has been sitting around for years and use it all up. I'll divide the stickers - the reds and purples won't be used within the kit as they don't match (in my mind) but I'll use them elsewhere this month.
And then the finishing touches - seam binding, thread, ribbon, washi, lace, flair and glitter, oh plus a few extra pretties!

As we can see I wasn't paying full attention as I have the turquoise colour completely wrong!! The real kit has much more of a blue tone than my green tone, but heyho! I'll have fun all the same!
I'll allow myself extras as I can see I haven't added enamel dots, inks etc.
Stand by for layouts...
:)
Looking forward to seeing how your project comes out. A lovely mix of colours and patterns.
ReplyDeleteHope you have a fab Friday. Sue
Oh this looks like a really well balanced kit to me - enjoy it!
ReplyDeleteLove your kit :) I love how you go about doing your kit too :) Closing the computer is smart :) Just may have to try that one month :) and thank you for the comment A may have to join you in that scrap challenge next month :) That would be the quickest way to get rid of them. I like your idea of grabbing an old pack of embellishments and using it up :)
ReplyDeleteI love your kit, especially the bits and bobs.Those acetate sheets plus gold butterflies are gorgeous.
ReplyDeleteReally like your take with the minty side of the blue/green papers. Always fun to hear the process & tweak my own from your hints! Happy New Year :D
ReplyDeleteGreat kit. You have some real nice stash!
ReplyDeleteNom. This looks like such a lovely kit to work with - not too much, not too little. Perfect x
ReplyDeleteA lovely kit, great idea to include some sticklers which I didn't even think about doing.
ReplyDeleteCindy F
I like it with the green, very special. Have fun with your beautiful kit.
ReplyDeleteI'm giggling because I'm sat thinking ooh I have some of those papers LOL! Fabulous kit and lovely to see the papers being used!
ReplyDelete