A few weeks back I made a dream catcher. A few readers asked if I could show them how I made it, so, here is my attempt at a tutorial!
First up weaving the web.
1. You'll need a hoop and some ribbon/thread/yarn on a bobbin.
2. Attach the ribbon securely to your hoop.
3. Take your ribbon over the top of the hoop...
4. and up through the loop you've just made with the ribbon...
5. so you have a cross over.

6. Continue steps 3-5 until you reach the knot.
7. Now instead of going over the hoop you will crossover the ribbon
8. and through the loop you've just made to give a crossover.
Continue on in this fashion until you get to the middle. You need to leave a hole in the middle as this is where the good dreams get through! They then run down the tassels/feathers/any other hanging decoration and on to the owner. It should look something like this. You'll need to play around with your tension until you get a firm web.

Now for the tassels - I like to use ribbons and button strings. You could use strips of fabric, strips of crepe paper, real or paper feathers... use whatever you fancy!
Attach your tassels using a larks head knot as shown and fix with a small stitch.
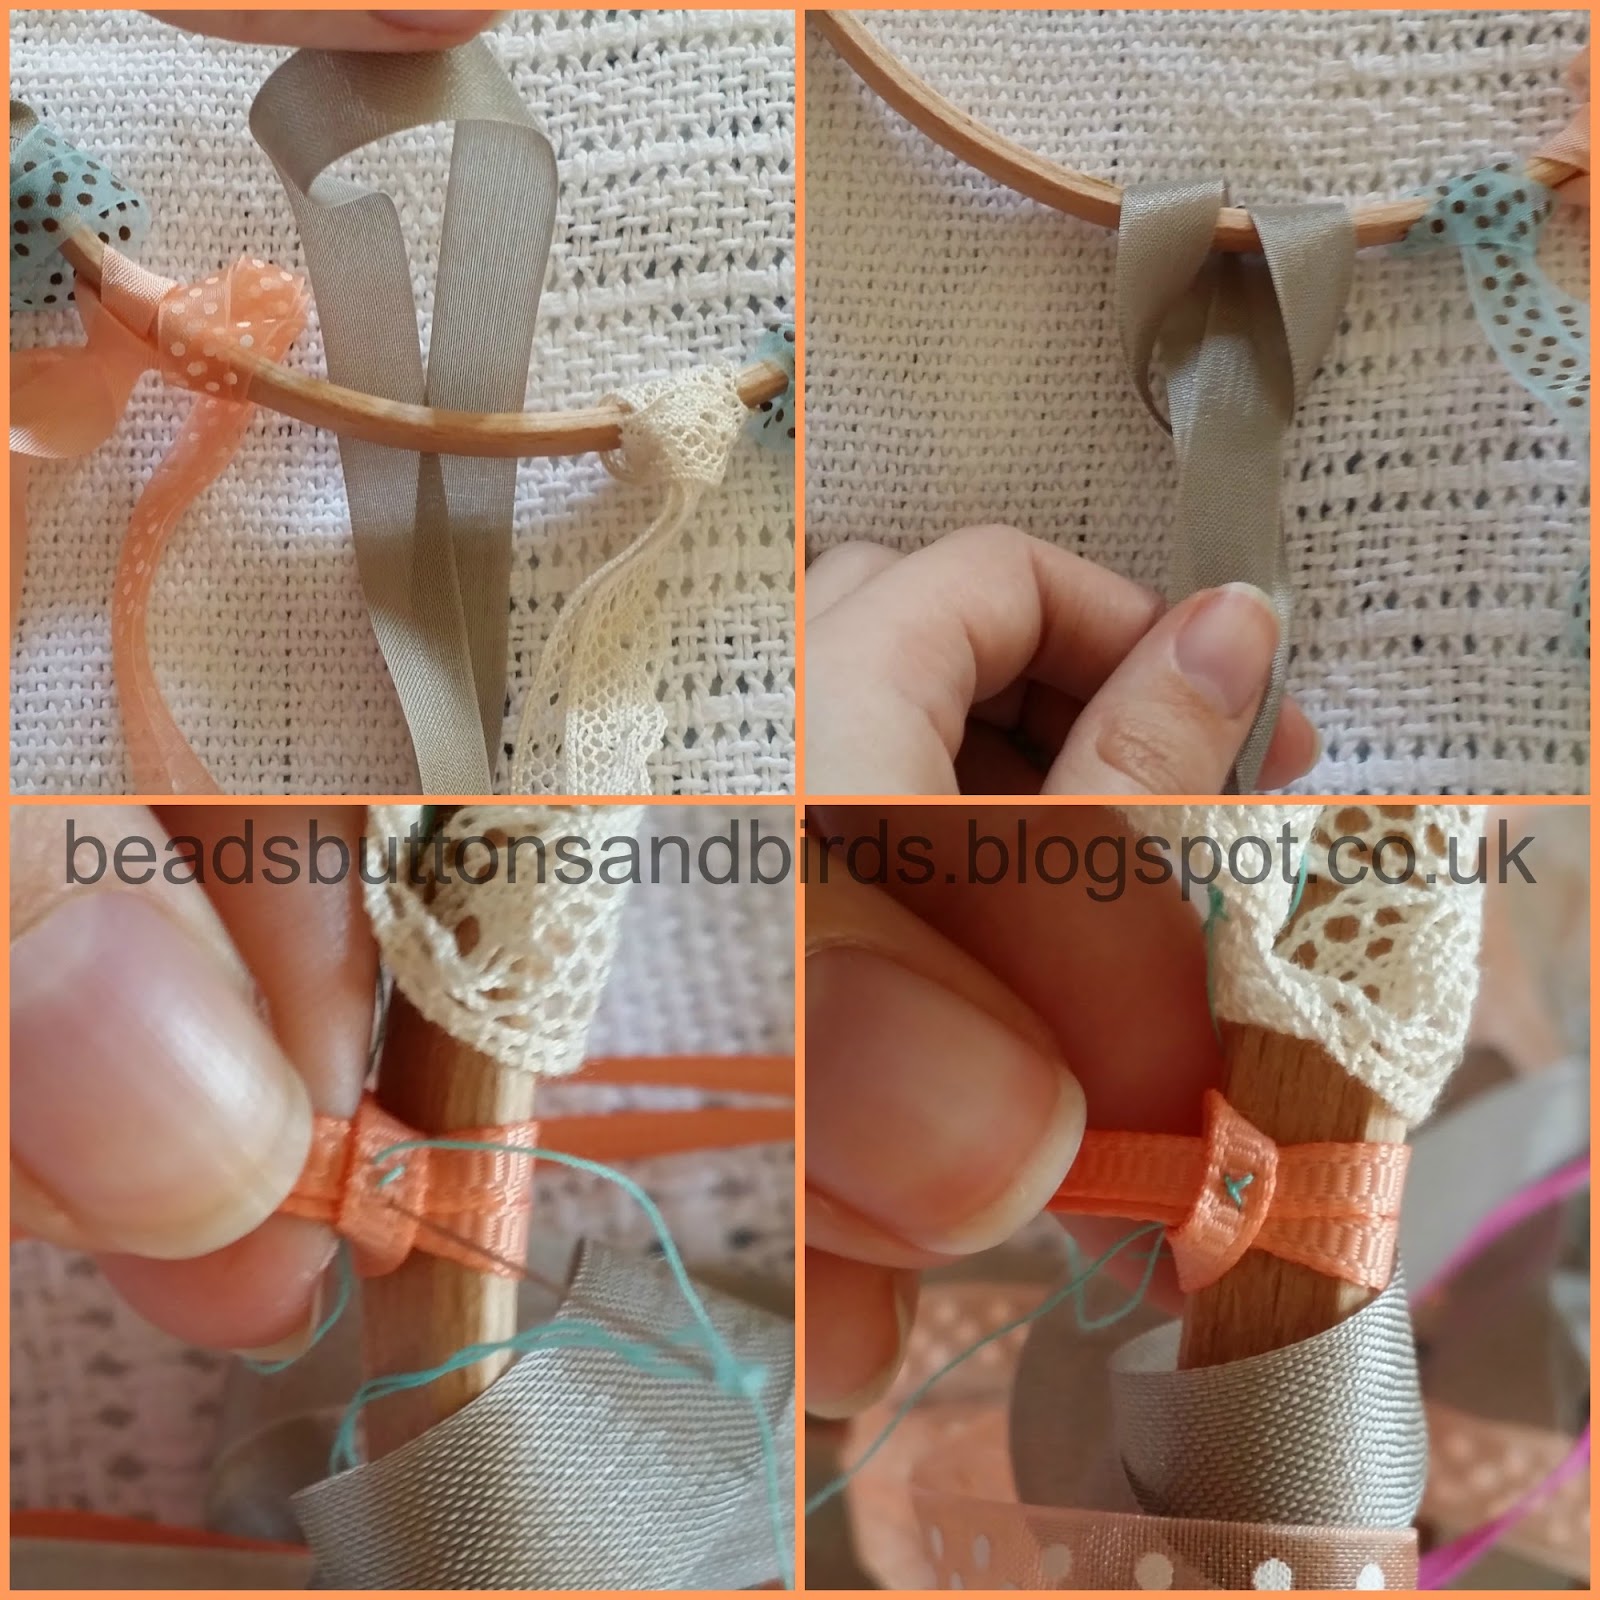
This is about as fancy as my stitching gets... a small x in contrasting thread!

I then decorated my tassels with sequins, buttons, glitter stickers and paper embellishments from my current Like For Ever kit.

I've also used a huge variety of ribbons, different widths, colours and textures, even adding lace too. I love the effect they give. All the ribbons I used come from Crafty Ribbons.

And there is the finished dream catcher. What do you think? Link me up to a photo if you have a go at making one - I'd love to see!
Sharing at Trash to Treasure, Creative Mondays and Inspire Me Mondays
This Do More In October post is a series run by Fab. You can see all my posts by clicking 'Do More In October' but for lots of other bloggers head over to Fab's blog for the link-up.
I love your dream catcher and such a great explanation too, I'm going to have a go at something similar with the children staying here on the farm. It would make a great activity hour craft. Do pop over and join me for Trash 2 Treasure , it is a monthly linky for upcycling tutorials like this. Delighted to find you from #CreativeMondays now having a look through your blog for other ideas too!
ReplyDeleteGlad you've found me too, your farm looks great - wish you were a bit nearer!
DeleteI'd suggest having some pre-woven hoops for the little ones, then they can add the tails and pretty bits. You can even make your own hoops by bending willow to make it completely recycled. I'm off to link up now!
The Willow or Hazel would be fab for here and as you say I can pre weave these for the younger ones. Thank you for linking up with me for #Trash2Treasure. Your blog looks full of great ideas so I hope you will join me again.
DeleteGreat tutorial Laura, I think I even have a couple of embroidery hoops somewhere left over from my dabbling in cross stitch days! TFS. xx
ReplyDeleteLaura, That's fab.
ReplyDeleteHope you have had a good start to the week. Sue